Add table layout
Once you register and enter the system you would see on the left side "Table Layout". Once you enter this section you will see a message: "Please input the table layout name?" to name your layout (e.g. Floor 1, Indoor, Outdoor etc,)
*Finger icon - edit the existing items on the table layout.
Picture - (1)
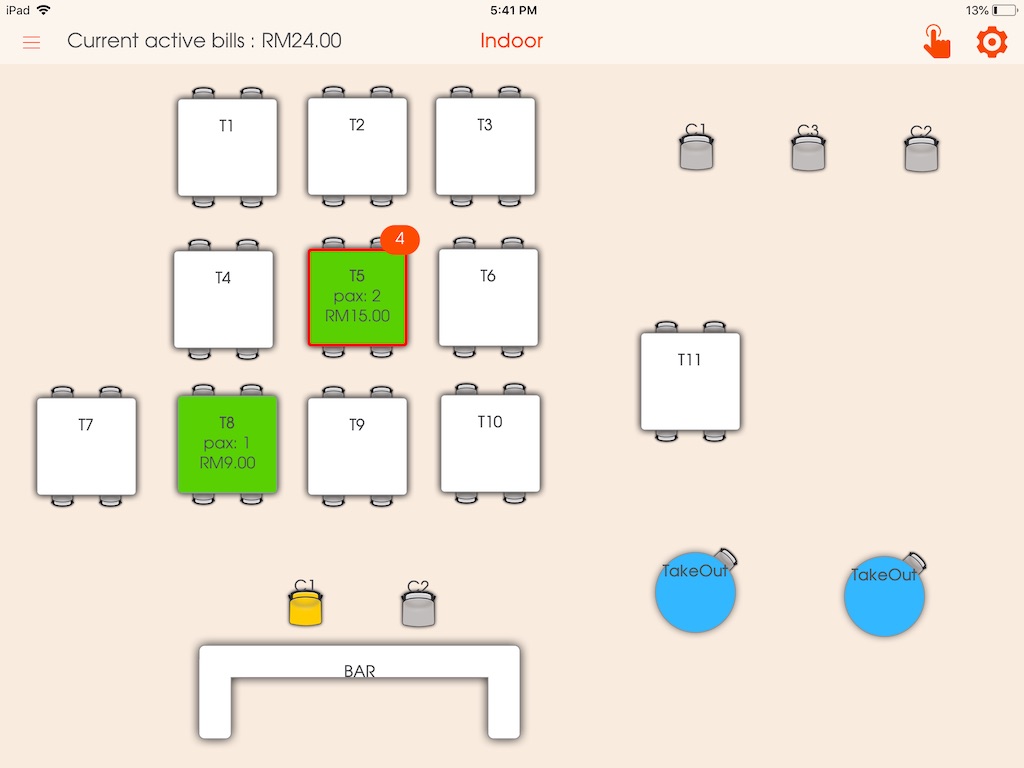
*Settings icon
*This section will guide you on how to organize and set the table layout. After every change you need to save & update. Picture - (2)
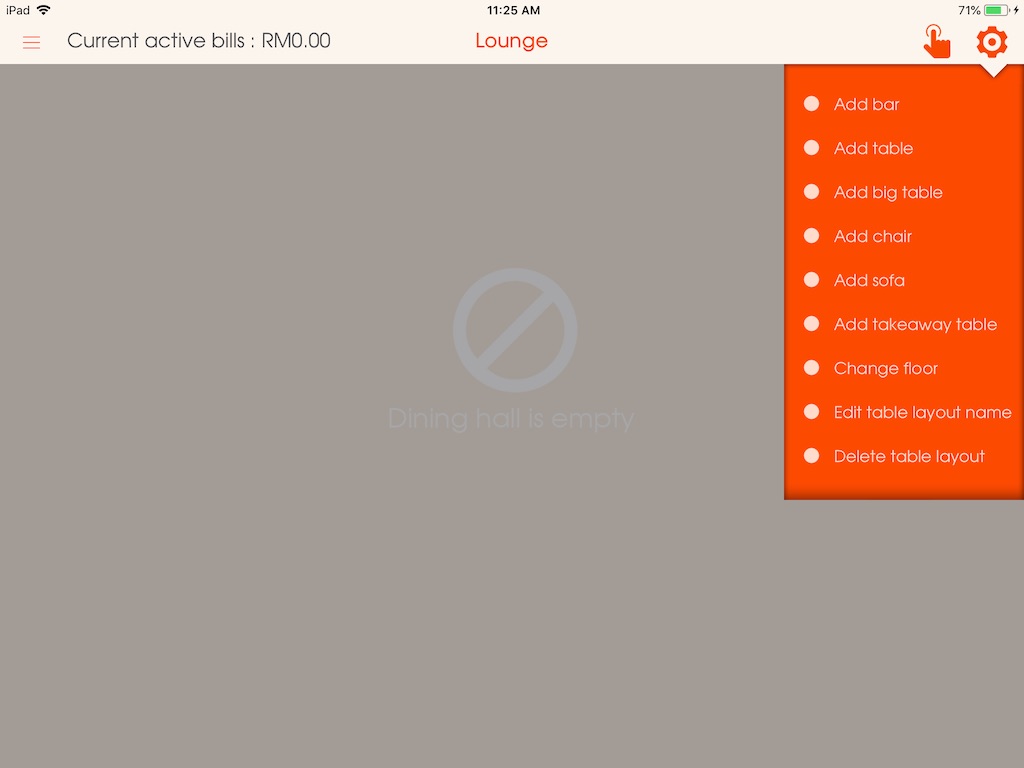
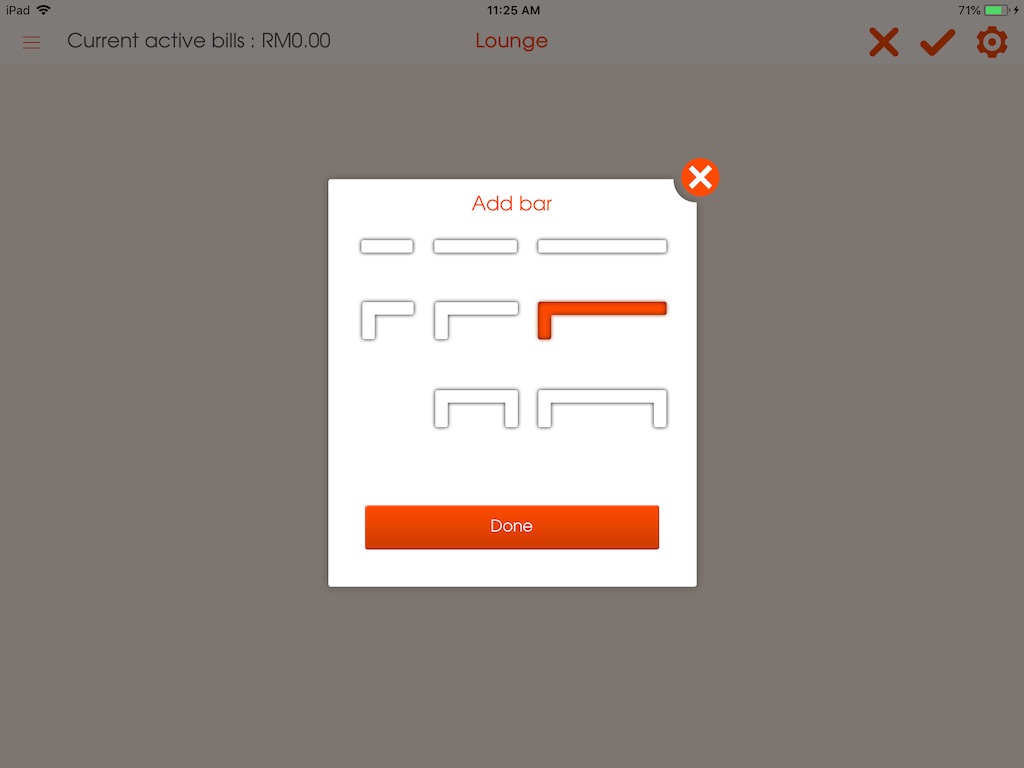
1. Add bar
- Choose the shape of the bar that resembles your bar & press "Done".
- Drag the item to your preferred space and place it on the layout.
- The items can be rotated by the half circle arrow on the right side of the item.
- The items can be deleted by the X button on the left side of the item.
*Press the "Check mark" icon to save your changes.
*Press the "X" icon to cancel all your changes.
Picture - (3)
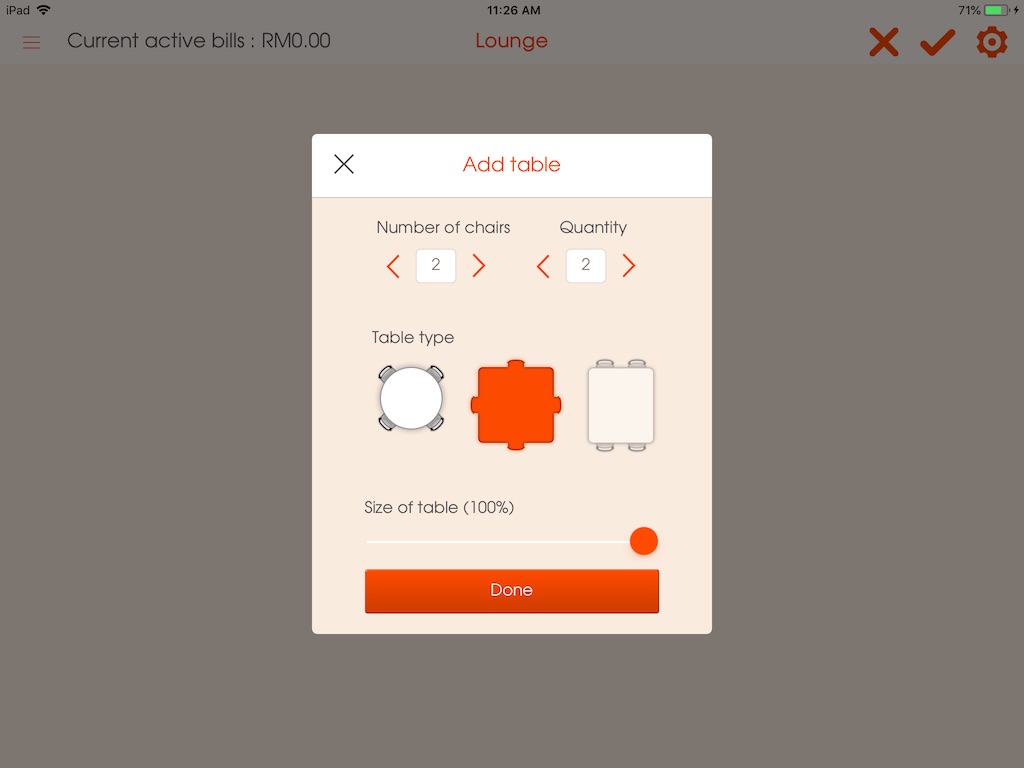
2. Add table
- Select the number of chairs.
- Select the quantity. (how many tables with the same shape and number of chairs would be needed)
- Choose the table type & press "Done"
- Drag the item to your preferred space and place it on the layout.
- The items can be rotated by the half circle arrow on the right side of the item.
- The items can be deleted by the X button on the left side of the item.
*Press the "Check mark" icon to save your changes.
*Press the "X" icon to cancel all your changes.
Picture - (4)
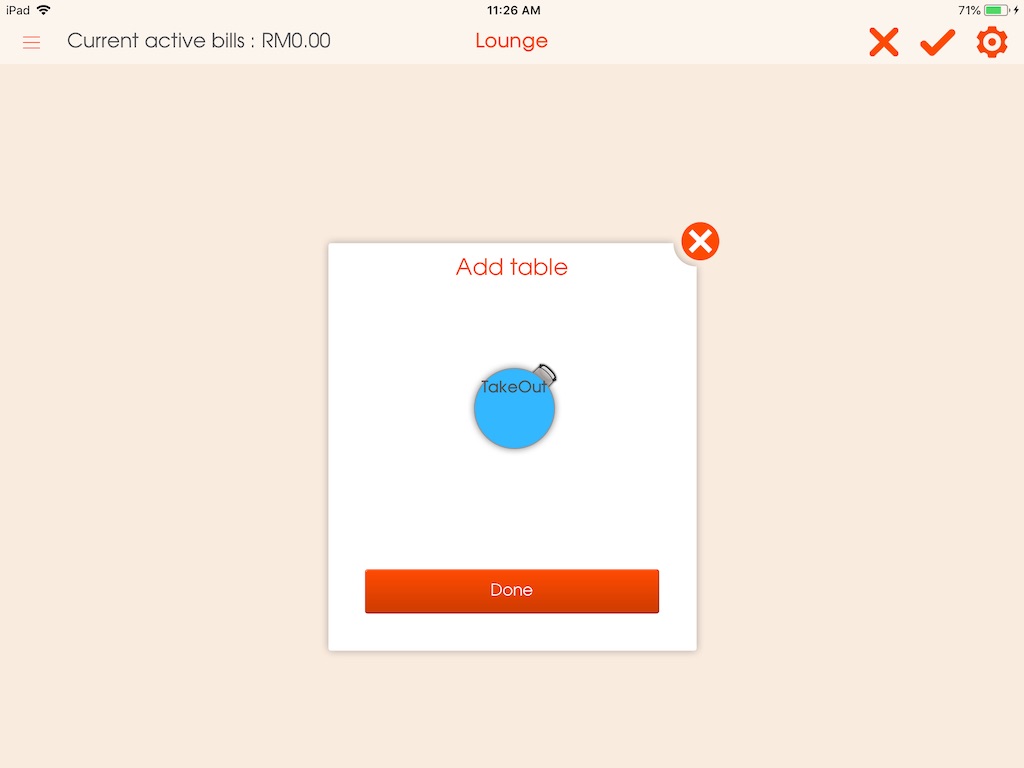
3. Add takeaway
Adding a takeaway table on your table layout will help differentiate the order from the other tables. Specifically this is to help the kitchen to distinguish the takeaway order and take following actions.
- Drag the item to your preferred space and place it on the layout.
- The items can be rotated by the half circle arrow on the right side of the item.
- The items can be deleted by the X button on the left side of the item.
*Press the "Check mark" icon to save your changes.
*Press the "X" icon to cancel all your changes.
Picture - (5)
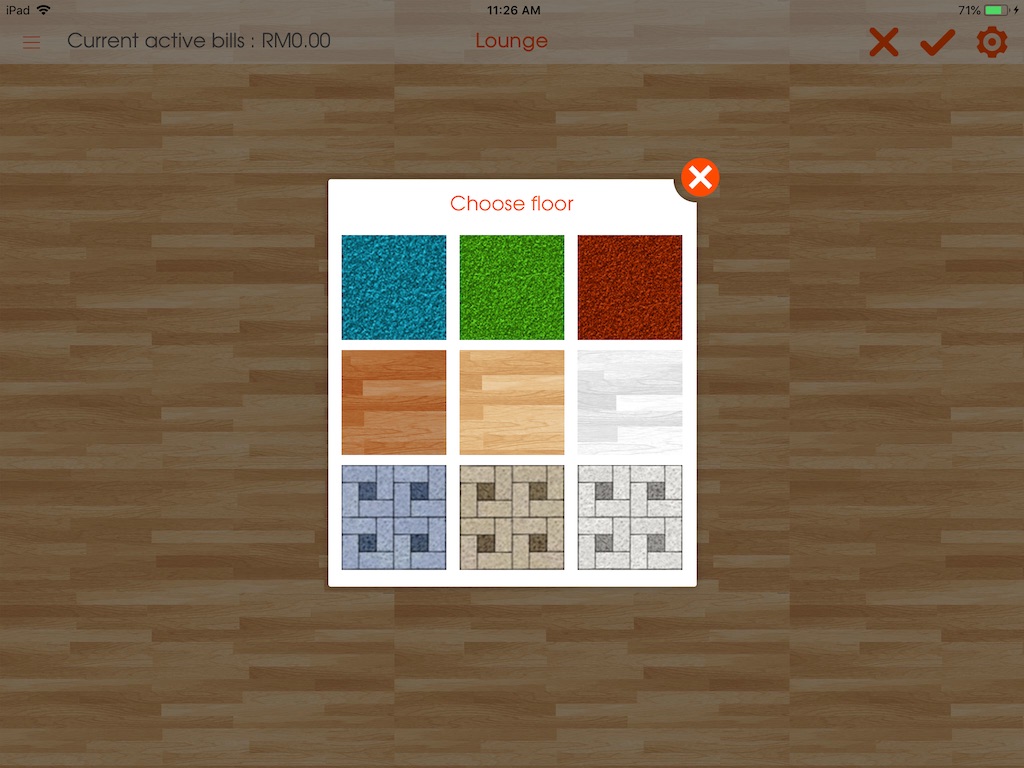
4. Change floor
Choose the preferred color/pattern for the floor.
*Press the "Check mark" icon to save your changes.
*Press the "X" icon to cancel all your changes.
Picture - (6)
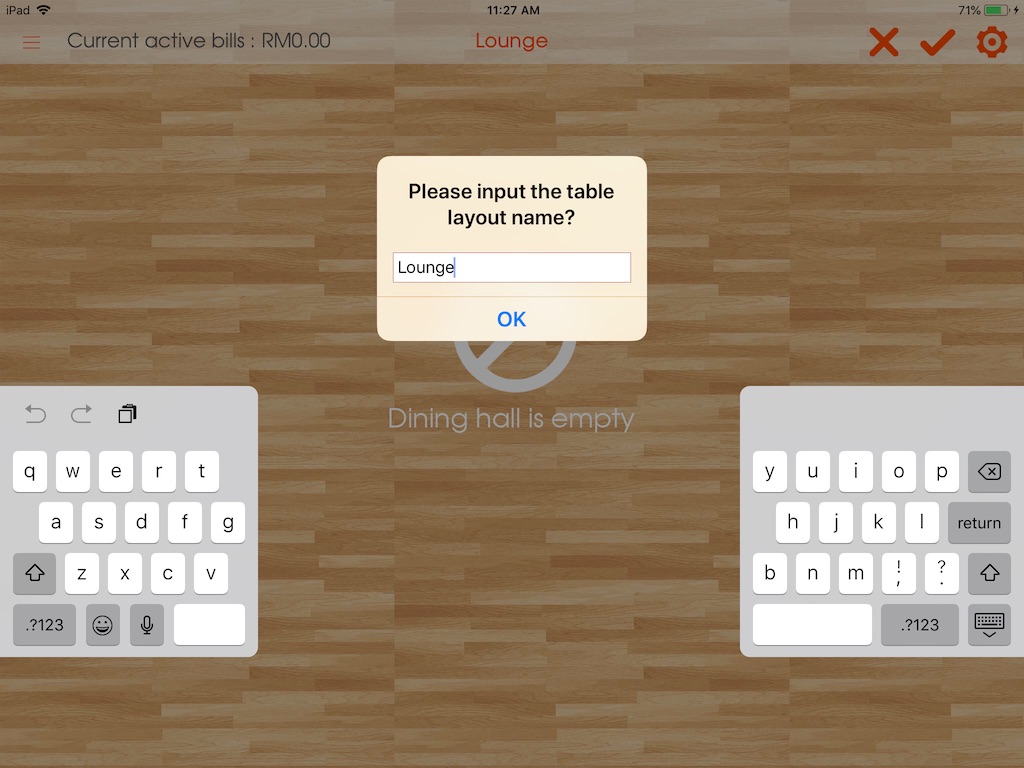
5. Edit table layout name
- Change the name and press "OK"
*Press the "Check mark" icon to save your changes.
*Press the "X" icon to cancel all your changes.
6. Delete table layout
- Delete the table layout if you find it unnecessary
7. Add new table layout
Once you add your first layout you can add additional floor layouts by pressing "Add Table Layout" located below your existing table layout(s)
-Enter a name/title for the table layout and click "Ok".
Picture - (7)
Once you complete editing your table layout you can now start selling.