Ingredient
In this section you can manage and organize the total food supplies in the departments to maintain its cost and supply. To successfully enter the ingredients to the database:
1. Create a "Main Category" (e.g. Bakery, pastry)
2. Create a "Sub Category" (e.g. Wheat bread)
3. Add the ingredient (e.g. flour)
After creating the ingredients you can assign the ingredients to menu items to control the inventory, track stock, and decrease the loss of ingredients. If the ingredients of the menu items are correctly entered to the system the actual data and the data of the system won't differ. Hence, please insert the right amount of the ingredients needed for each menu item. The ingredient amount used should strictly follow the guideline.
-
Main category
On this list Picture - (1) you can see the general category of ingredients you have in your inventory. From the main category of ingredients you can see & add the sub-categories by clicking on the "Sub categories" tab on each main category of the ingredients. In "Action" line you can delete the product/ingredient.
Picture - (1)
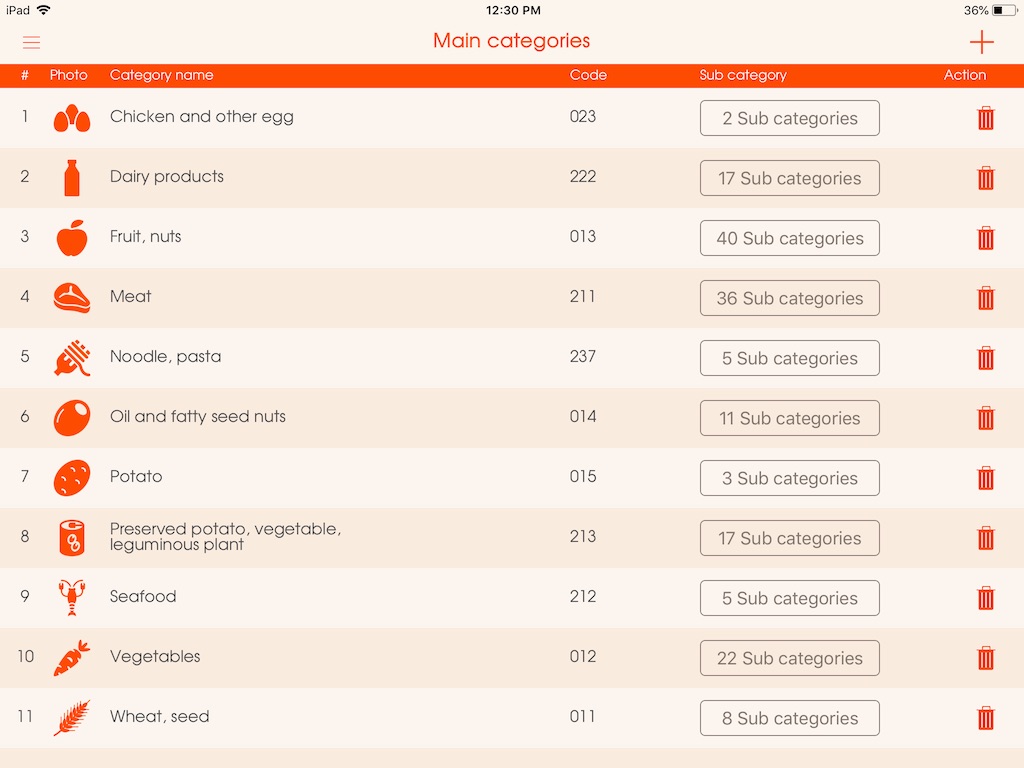
To add new main category of an ingredient:
- Click on the + icon on top right corner of the screen
- Choose a category of the ingredients that has not been created.Picture - (2)

-
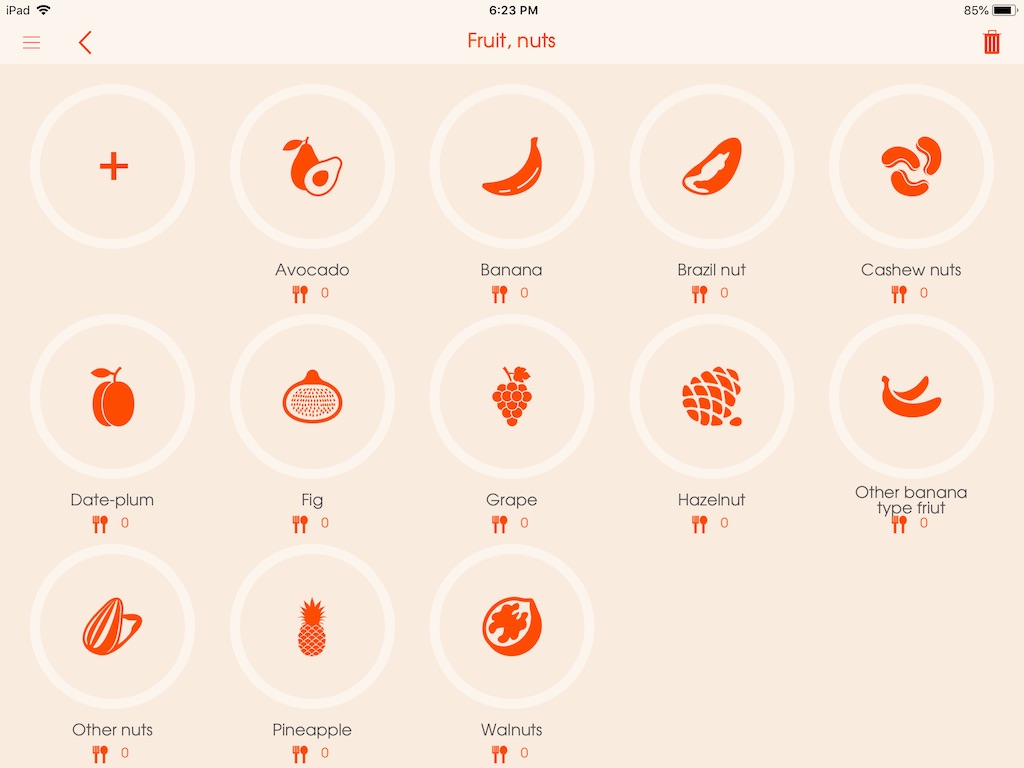
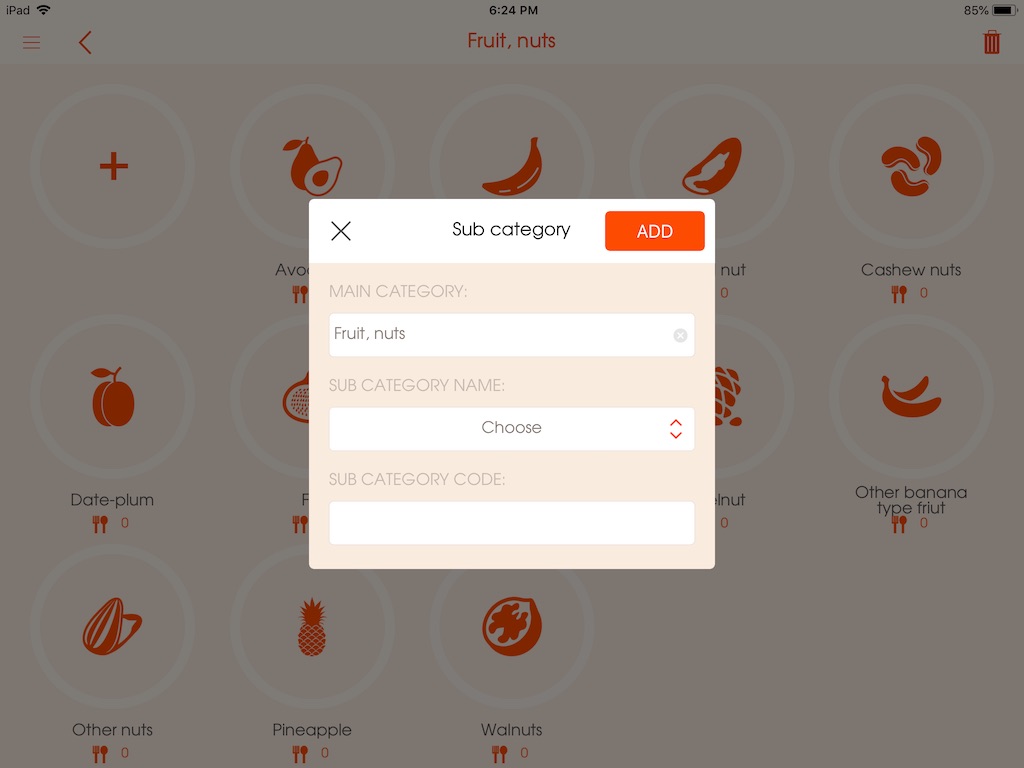
Sub category
To add a sub category:
- Click on the "Sub categories" bar of the main category of the ingredients that you would like to add. (Image - 069)
- Click on the + icon
- Choose a sub category name
- Click "Add".Picture - (3)
Picture - (4)
-
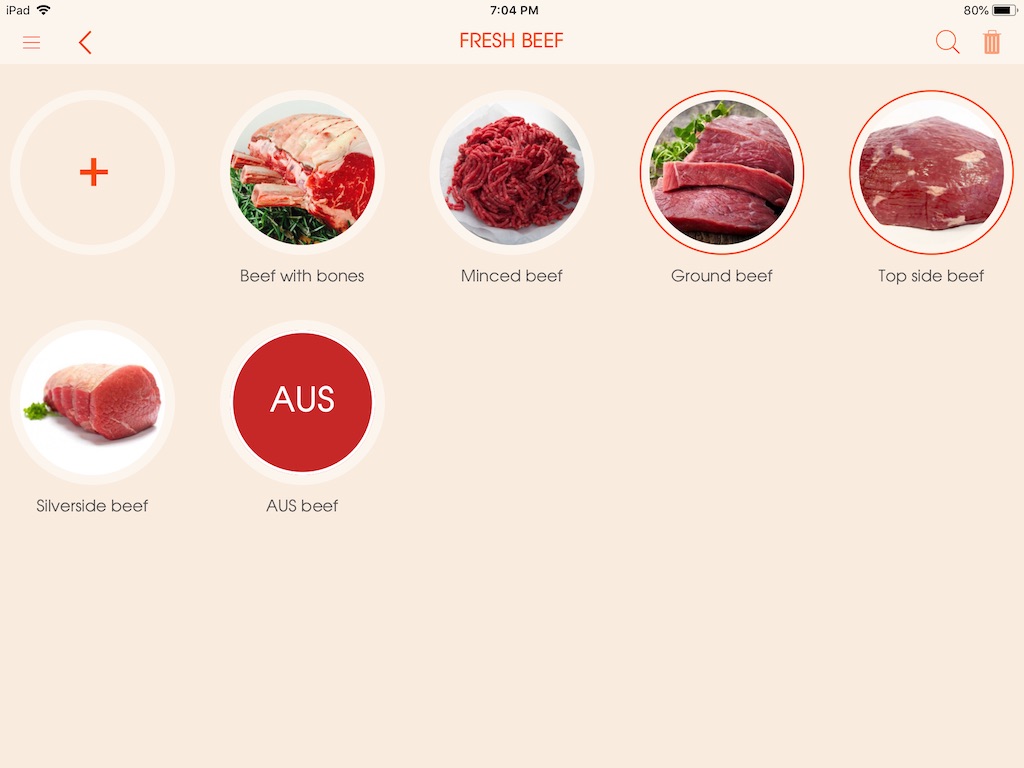
Ingredients
To Delete a selected Ingredient simply click on the "bin" icon Picture - (5)
To Search an Ingredient click on the magnifying glass icon and enter the name of the ingredient Picture - (6)Picture - (5)
Picture - (6)

-
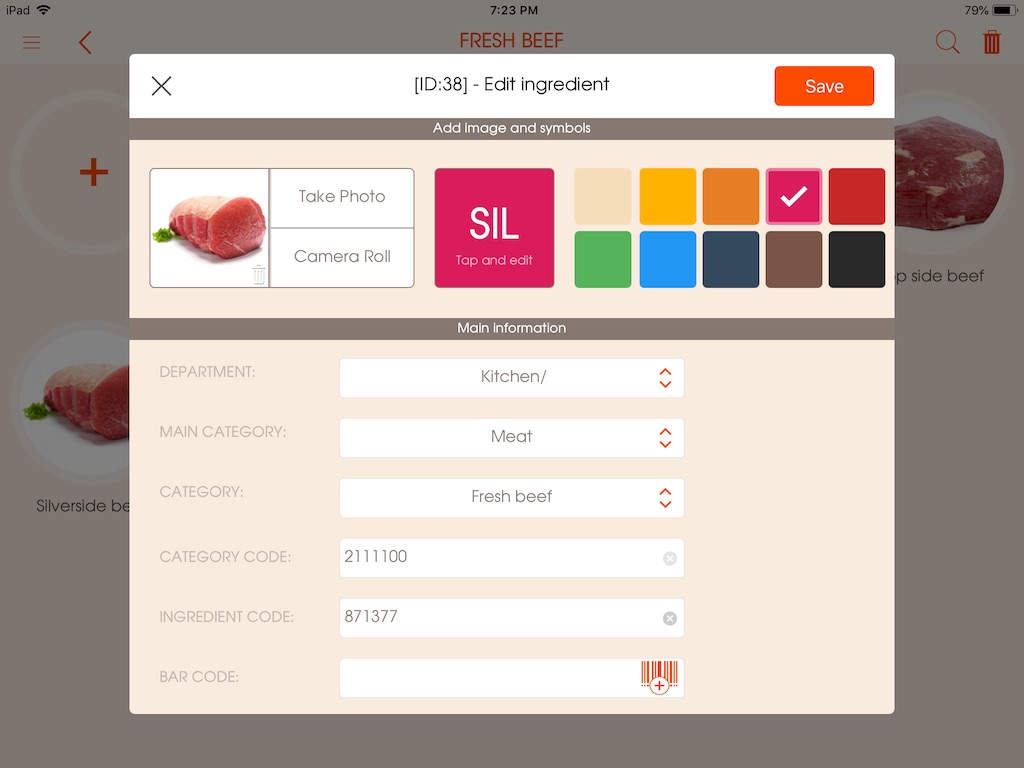
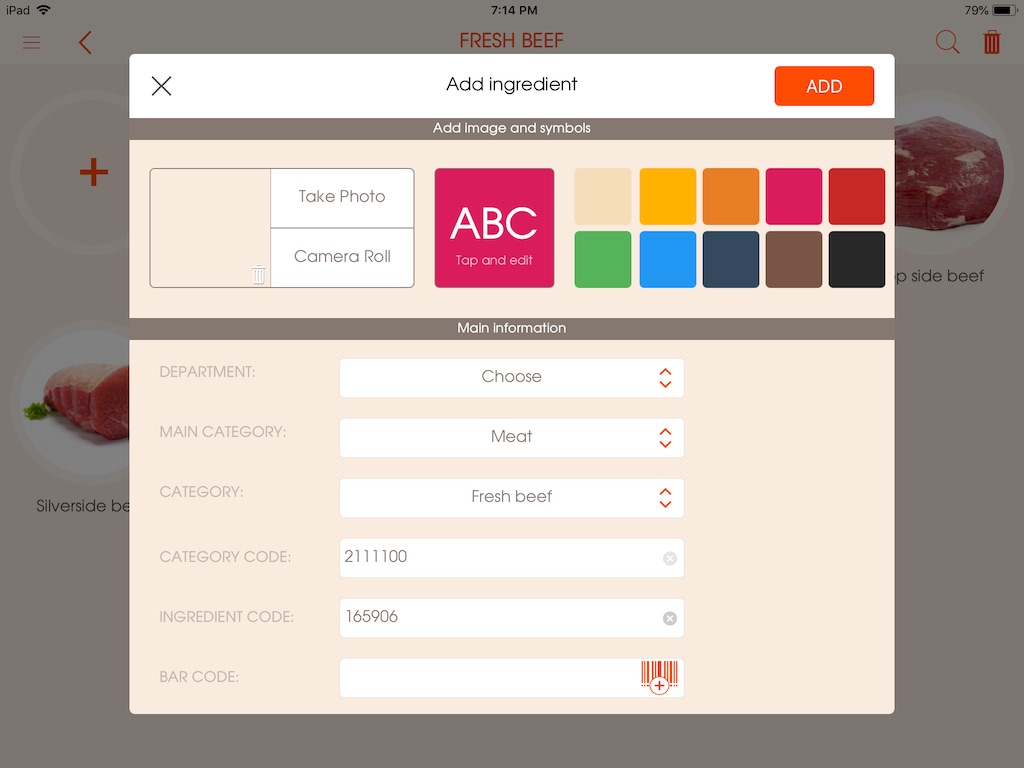
Add ingredient
As you click on the sub-category bracket, the page opens a page with the category icon on. In this section you can customize the selected ingredient. If you click on the icon, the "Add" pops up. Click on the icon to add additional details about the ingredient. After clicking on the icon. you can customize the ingredient.
*ADD IMAGE AND SYMBOLS
- Instead of a clip icon you can insert the photo of the ingredient by simply clicking on "Take Photo" bracket. If you already have the photo of the ingredient you can select "Camera Roll" instead.
- On the "ABC" icon you can choose out a color line that circles the product at the "Main Category" section. In this you have 10 different colored squares of your choice.*MAIN INFORMATION
On "department category" you can select where the selected ingredient belongs to. Exp: Drinks, snacks etc.
On "Main category" you can select the primary brach of the ingredient. Exp: Meat, Vegetable, Pastry, seasoning etc.
On "Category" you can select the exact type of the ingredient. As for example on Meat, whether it is Frozen or Defrosted etc.
On the"Category Code"you can see the bar-code of the general ingredient.
On the "Ingredient code" yo can see the code of the selected ingredient.
On "Bar code" bar you can insert and customize the selected ingredients bar-code.
On "Ingredient Name" bar you can customize the name of the "selected Ingredient".
Down below there is Major/Minor unit bar, where you can select the measurement of the ingredient. E.g: Kilogram/gram, Liter/milliliter etc.
Once you choose the major/minor units you can proceed to enter the price of the unit that you've entered. (e.g. for 1000g of wheat bread the price is 50$)
In the "Minimum stock" you can insert a threshold of the particular ingredient's stock.
- Click "Add" to create the ingredientPicture - (7)
-
Edit ingredient
To edit an ingredient:
- Click on the ingredient's icon that you would like to edit Picture - (8)
- Make the necessary changes and click "Save".Picture - (8)